Before buying a phone all of us first checks the features of the phone which include its
camera,processor,ram,screen size….etc…etc. And we also not to forget to checks its internal storage..!!!!
Most of you must have rejected the phone because it doesn’t have sufficient internal storage … !!
But today we have came up with a trick with the help of which you can:
1) Ease the burden of the internal storage on the device.
2) The issue of lower internal memory space on your mobile devices, especially for smartphones or PC tablets, will be resolved too.
3) By default your apps will be installed in SD card.
Does it mean that we will increase the internal storage capacity?
The answer is big NO…we will create partition on SD card so that the apps that usually gets install in your phone memory will be install in you SD card by default..giving you free internal space!
Partitioning of SD card:
1) Download the tool
First, you have to download the tool, in this article we will use the minitool partition wizard, then install it on your PC / laptop.
2) How to use the Tool
1. Make sure that your phone Usb Connection mode is Mass Storage mode.Now connect your phone to PC.
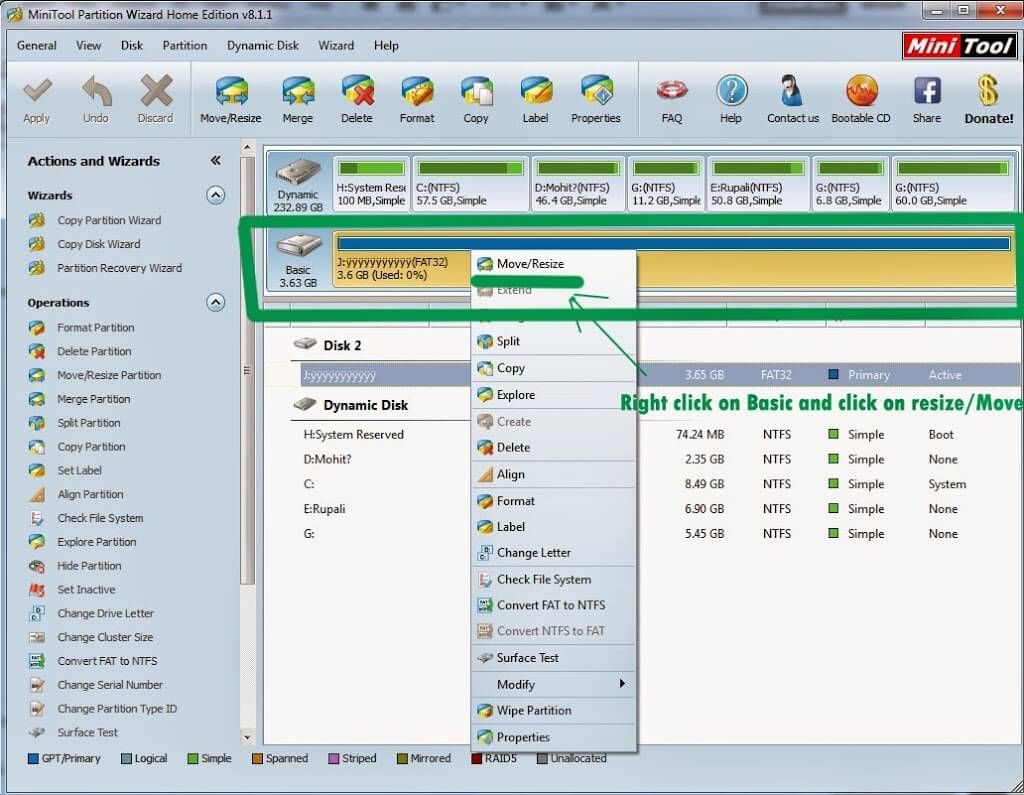
2. Run the minitool partition wizard on your PC, choose Basic/Disk 2 then right click and choose move/resize just like the image below
3. On this section, we will create the first partition that can be used for storing things like music,movies and files etc. So this partition needs a bigger storage space, say between 75% – 95% or even more of the total of the microSD storage capacity. You can set the storage capacity by sliding the right bar edge just like the image below. Click OK after that.
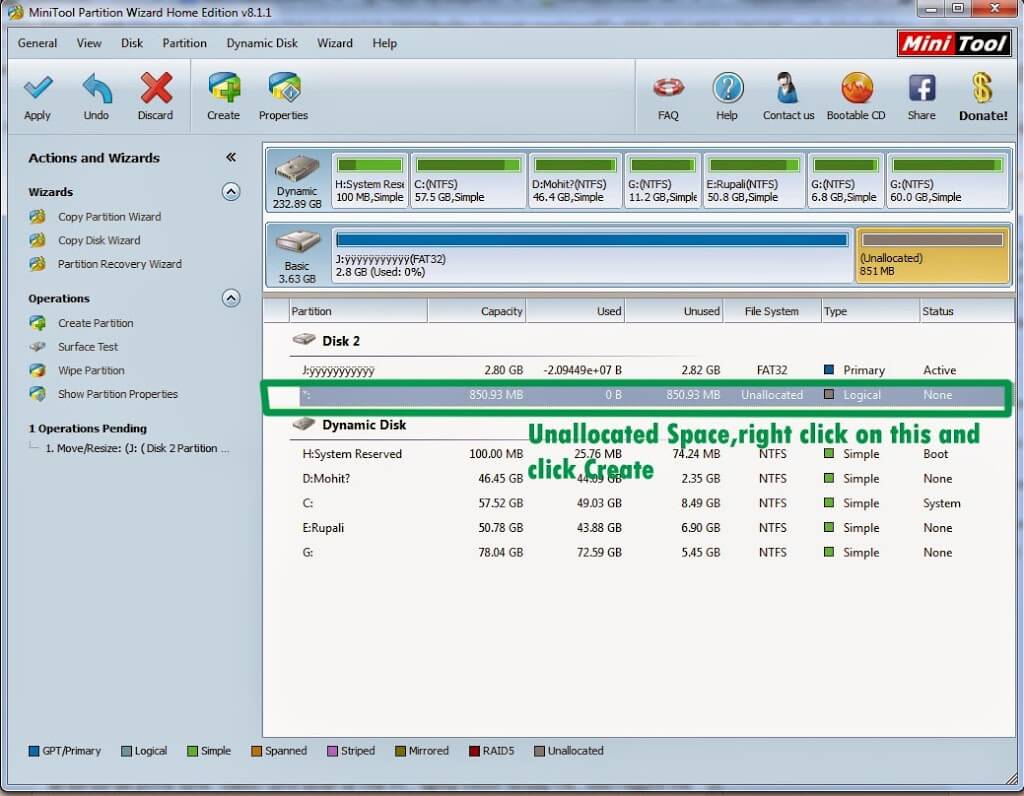
4. Then we will use the rest of the storage capacity (as your own setting above) for the second partition. Look at the picture below, right click on it, then choose create. If there’s a popup menu shown after clicking create, just click on “yes” option.
5. Look at the image below. For the “file system” section, set it as Ext2, and for “create as” section, set it as primary then click OK.
6. Then if you’re done, click apply. But make sure that you have sets the right file system (FAT32 & Ext2), and both of them create as primary.
Now a pop up will appear asking you to close all apps on your PC (Except this app), and do not use the power saver / battery saver mode on your PC / laptop before clicking OK.
Wait till the Partition is Done.


