Table of Contents
WordPress was born as a blogging platform first and later it becomes a web development tool and content management software as well. There are many reasons to use the most popular CMS system but some of them are –
- Easy to use – WordPress has inbuilt dashboard and intuitive interface which makes it easy to use for a newbie too.
- Responsive Design – As mobile devices are used frequently for internet, it’s necessary for businesses to have the responsive websites. WordPress is providing many themes and plugins to create a mobile responsive site.
- Multiple theme options – Theme customization is one of the best feature provided by WordPress. Thousands of themes are available for thousands of requirements.
- Plugins for customization – You can add various functionalities with the help of WordPress plugins.
- Self-hosted platform – You can choose any service provider and install a WordPress.org in it.
- Better scalability –Add as much as pages you want, it will never harm your website performance.
- Easy social media integration – Social channels can be easily integrated within a website.
- SEO friendly – The simple and clean code of WordPress allows search engines to understand the content easily.
- Community support – The WordPress community is much active and provides constant support to its users.
Those who have started for WordPress for blogging and website might get confused on its dashboard. For the sake of beginners, we are here to guide you how to use WordPress dashboard. You don’t need to be techy at all. Let’s dig in and find out how to use the WordPress dashboard.
Get on the dashboard
Access your dashboard and log in it first. After logging into the dashboard, the dashboard will be open and you will see different parts of it on your screen. Now on the left side of your screen, you will see a black coloured menu.
How To Use The WordPress Dashboard, Let’s understand every section
The first item on the menu is dashboard itself when you click it, it will show you the summary screen. The summary screen is a complete overview of your activities on the site. Also, it will give you acknowledgement about upcoming news and events.
Home
There is nothing much to view in this zone, it will direct you the home page of your website or blog.
Updates
This is an important part which shows what you need to update. Whether it’s a plugin or a theme, a number in red colour will be always pop up to remind you of a total number of updates.
On clicking it, you can directly update the required things on dashboard area. Isn’t it simple? Yes, that’s why WordPress is easy to use.
Posts and Pages

Here you can add content to your website or blog. For blogs use the Post and use page for static content. (We’ll discuss Media in next point)
Posts → Add → New or Pages → Add New
Media 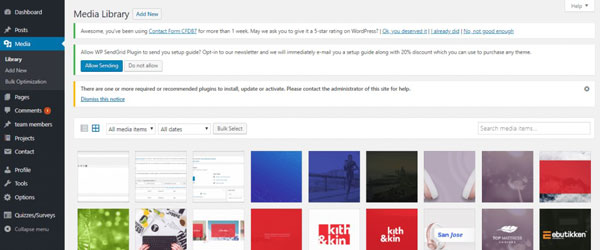
After the post, the next element is the media. It saves all your media files. As you are a beginner, your media library will be empty.
Comments 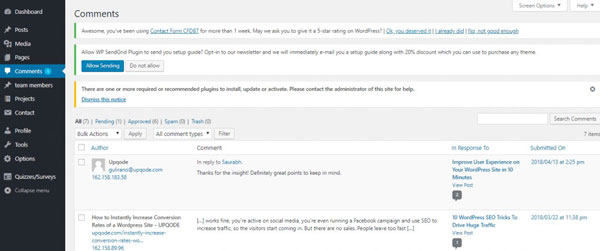
If you own a blog, all the comments done by readers and subscribers will be visible in this zone. Again you are new, it will show no comments.
Appearance 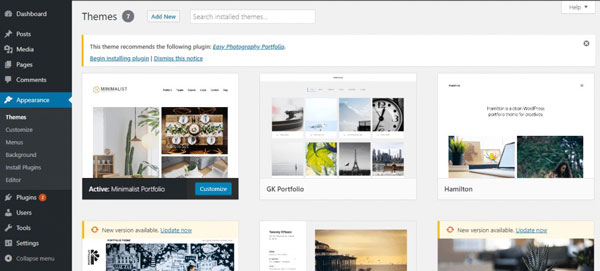
It allows you to change the look of your website. You can choose theme, colours and widgets for your page/blog.
Themes
It allows you to choose themes from standard WordPress themes. You can use a free theme or a paid theme.
After applying the theme, you can customize it accordingly. Below ‘theme’, there is an option of “Customize”.
Widgets
The small block that performs a specific function is called Widgets in WordPress. It is used to add functionality to your theme. Here, you can add galleries, quotes, Facebook live boxes and popular posts etc.
Menu
The navigation menus which you are going to put in your site/blog.
Plugins
It allows you to add functionality to your website/blog. You can manage, activate and deactivate the plugins as per your need. Some of them are free and some are paid. You can use any of them to add various functionalities.
Users
It is used to manage the users of the site. You can edit your profile by here, edit details, reset the password, change the email address and display name etc.
Tools
It allows us to perform non-routine tasks. There are three options in it – available tools, import and export.
Settings
With the help of ‘Settings’, you can maintain many options such as website name, permalinks and site address and many more. There are five sub categories inside the Settings option. Let’s have a quick look on each –
- General – It includes title, taglines, email address, WordPress address, and date and time settings.
- Writing – It defines your post types and categories.
- Reading – It defines how visitors read your website.
- Discussion – It includes comment sections which you can off and on according to your choice.
- Media – It gives an idea about the size of media files such as images.
- Permalinks – It is about URL structure of post and pages.
Screen options
At the top right corner of the screen, Screen options menu is there. On clicking it, you can customize the menu region looks and functionality as per your convenience.
If you are a visual learn you can watch this YouTube video by Wix Training Academy:
[su_youtube_advanced url=”https://www.youtube.com/watch?v=RkR6nT3-8aM”]
Final thoughts
Your dashboard will vary all the time when you start using it. It looks like a simple page but provides you with a lot of functionalities to add on your website or blog. If you learn how to control it, you will have a fantastic workflow. It is a better place to view and save your work, control your comments and many more. Also, you can keep a track of traffic statistics. All you need is to just start off with it.
If you think I have missed something in how to use the WordPress Dashboard than do tell me by commenting below.


